About these techniques
Invisible joins are awesome! They can give you a clean edge to create a cleaner color change, to make assembling pieces easier, or just to look nice. Try an invisible join when you're about to tie-off a piece or just before a color change.
Below you'll find step-by-step instructions for three different versions along with images (right and left-handed).
These techniques work by cutting your yarn and using the end to create a fake stitch over the top of another stitch. This blends the end of the row into the beginning of the row and lessens the "jog" created by working in a spiral.
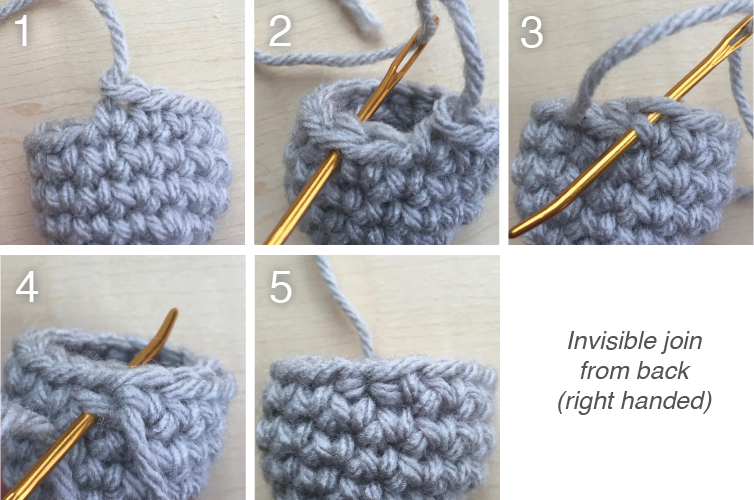
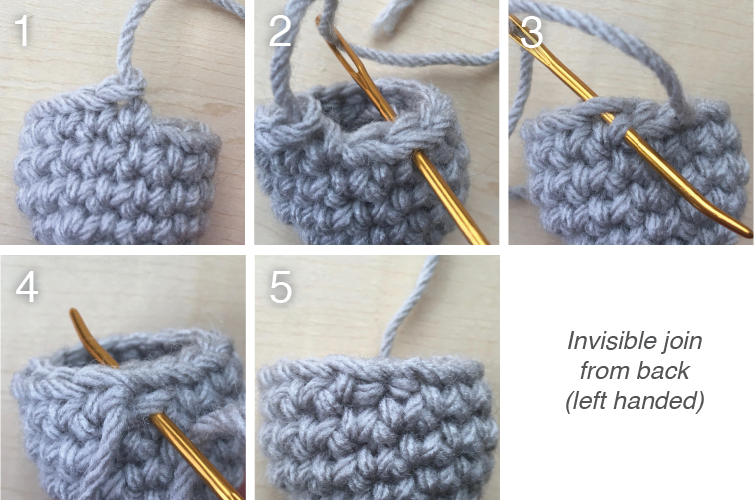
From the back:
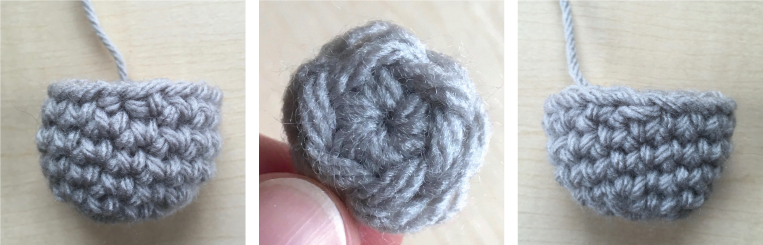
This is the technique I use when finishing an amigurumi piece in the round.
- Cut your working yarn (leaving a long end) and pull out the end.
- Skip one stitch, then thread the end under the two loops of the next stitch from the back. This will create a fake stitch over the top of the first stitch of the round.
- Thread the end back through the top of your last created stitch, then under one leg of the V from your last single crochet (the leg closest to your fake stitch).
- Then thread the end under the top two loops of the single crochet you skipped in step two (the first single crochet of your round).
- Tighten your newly created loop to the size of the other stitches and secure.
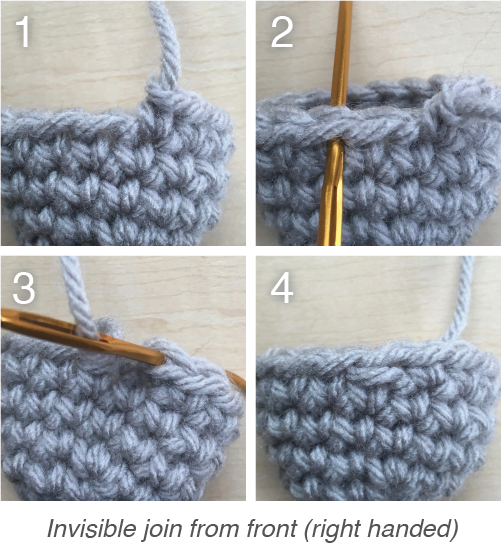
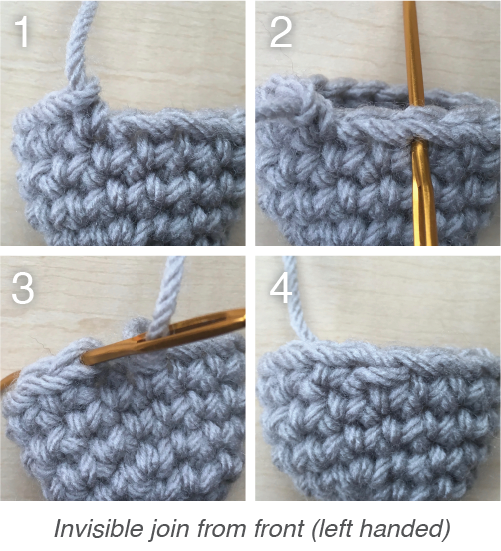
From the front:
This one is a little more simple than the version worked from the back.
- Cut your working yarn (leaving a long end) and pull out the end.
- Skip one stitch, then thread the end under the two loops of the next stitch from the front. This will create a fake stitch over the top of the first stitch of the round.
- Thread the end back through the top of your last created stitch.
- Tighten your newly created loop to the size of the other stitches and secure.
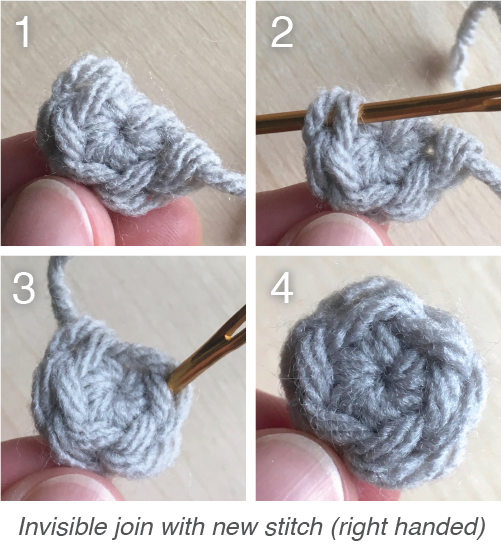
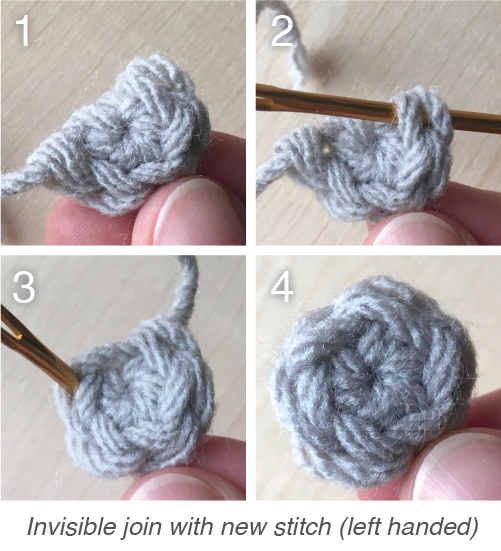
Make a new stitch:
So this one isn't worked over a stitch to replace it but creates its own stitch. I like to use this technique when I'm making flat shapes (like this circle). It creates a clean shape without adding any extra bulk.
- Cut your working yarn (leaving a long end) and pull out the end.
- Using an embroidery needle, thread the end under the two loops of the first stitch of the round.
- Then thread the end back through the top of your last created stitch.
- Tighten your newly created loop to the size of the other stitches and secure.